Edit like pro


How to edit a photo with Snapseed:
- Presets and filters
- Exposure
- White balance
- Crop, rotate, and perspective
- Brush tool
- Healing
Photo shot with a smartphone


I wanted the image to be a general photo any person can shoot, so I took a quick snapshot of a wooden statue I keep at home. No overthinking, no lights, no reflectors, no nothing. This is a simple shot we can turn into something awesome through the power of photo editing.
1. Consider Snapseed’s presets and filters


I am no fan of presets or filters, but there is no denying they make life easier than learning a plethora of editing parameters. After importing an image into Snapseed, you will see a tab at the lower-left corner that says LOOKS. Tap on it and look through Snapseed’s filters.
In addition, you can go to the TOOLS tab and find the HDR Scape, Glamour Glow, Drama, Vintage, Grainy Film, Grunge, Retrolux, Noir, Portrait, Lens Blur, and other special effects.
1. Open An Image In Snapseed Photo Editor
2. Enhance Color, Exposure & Detail
2.1 Tune Image
2.2 White Balance
2.3 Details
4. Improve Composition
4.1 Crop
4.2 Rotate
4.3 Perspective
5. Clean Up Your Photos For Flawless Edits
5.1 Healing
5.2 Portrait
6. Use Selective Editing Tools
6.1 Brush
6.2 Selective
6.3 Masking
6.4 Vignette
7. Change The Mood With Snapseed Filters
8. Use Looks As A Starting Point For Your Edits
8.1 Apply A Look To Your Photo
8.2 Customize A Look
8.3 Create Your Own Custom Looks
Open An Image In Snapseed Photo Editor
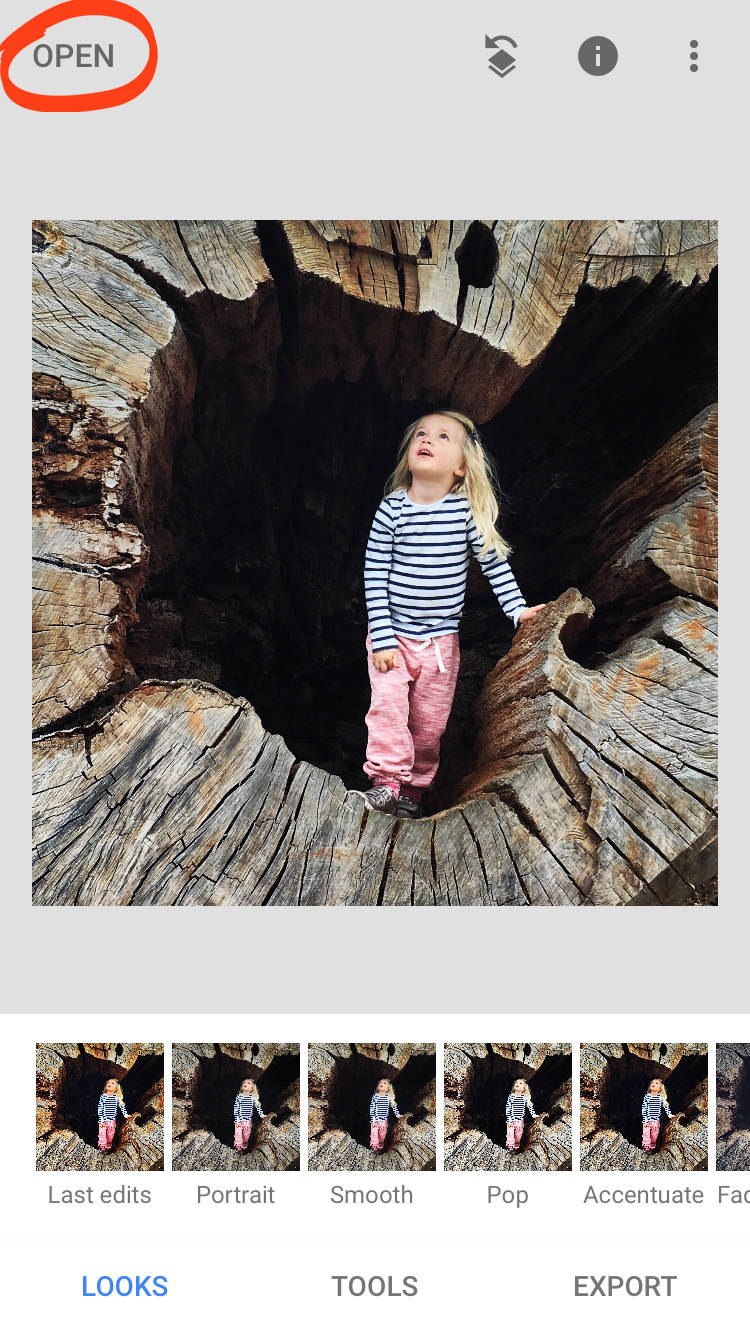
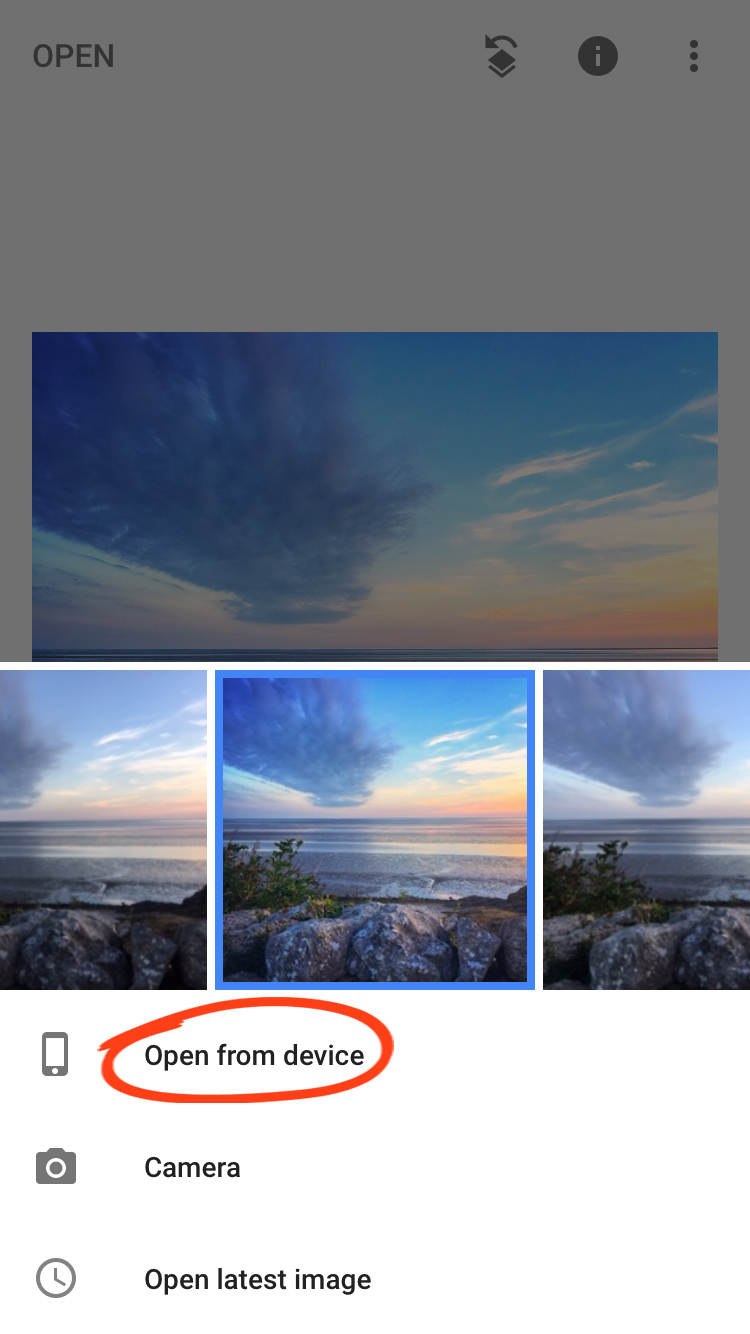
In the Snapseed app, tap Open.
Tap Open From Device to access your iPhone’s photo library and albums. Or swipe across the row of image thumbnails to see your recent images. Tap on the photo you want to open.
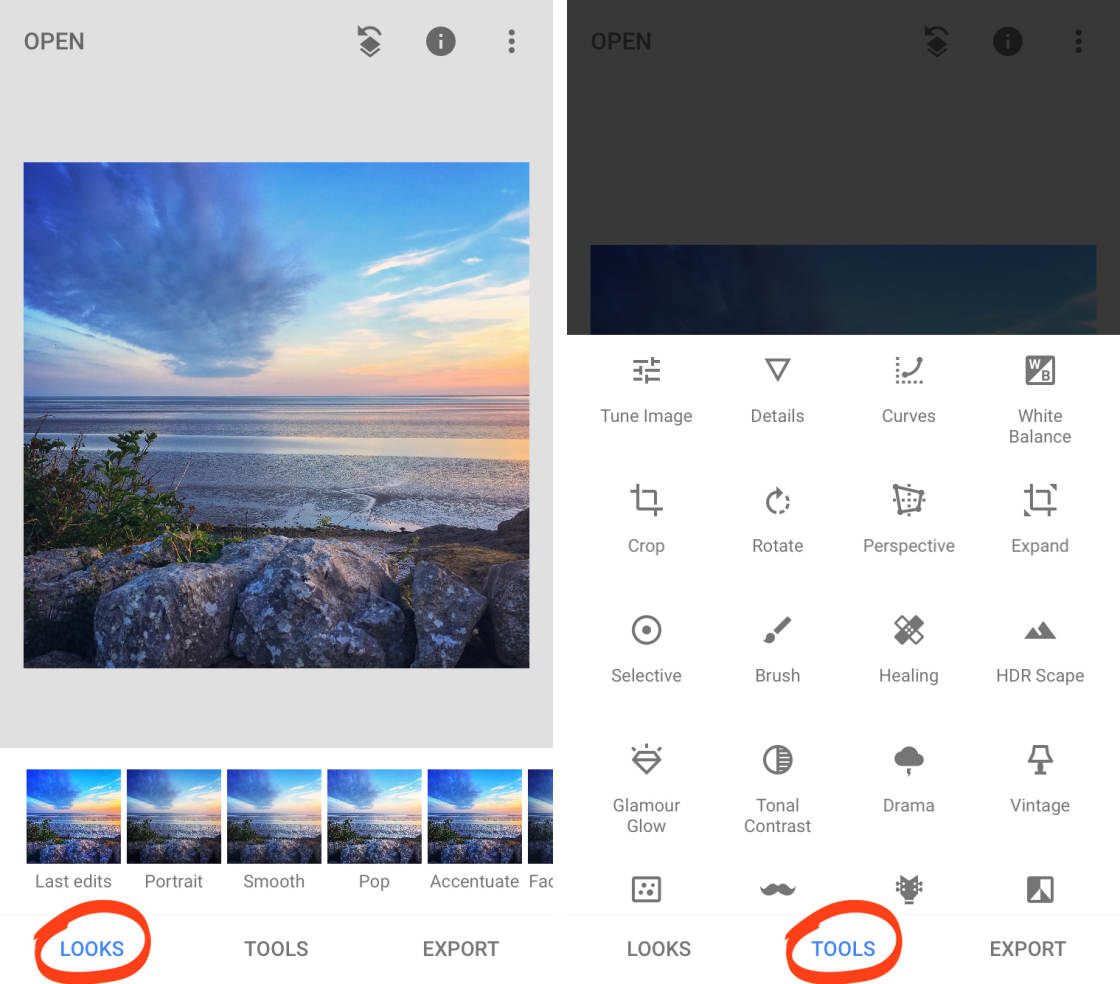
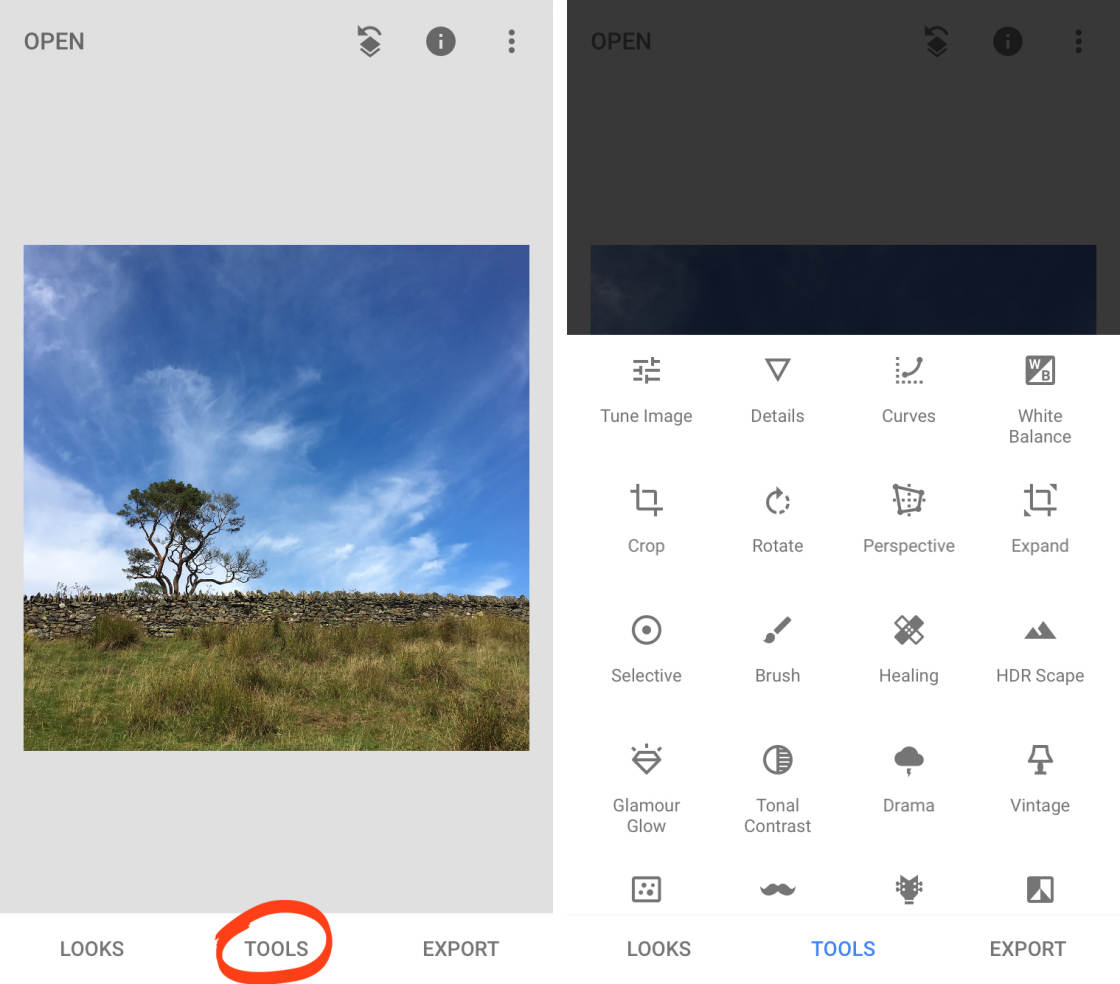
There are two Snapseed photo editing areas within the app: Looks and Tools. Switch between these areas by tapping Looks or Tools at the bottom of the screen.
In this Snapseed tutorial, you’ll learn how to use Looks and Tools to create beautiful iPhone photos.
2. Enhance Color, Exposure & Detail
In this section, you’ll discover how to improve color, exposure (brightness levels), and detail in your photos. With a few simple edits, you can turn an ordinary dull photo into a spectacular masterpiece.
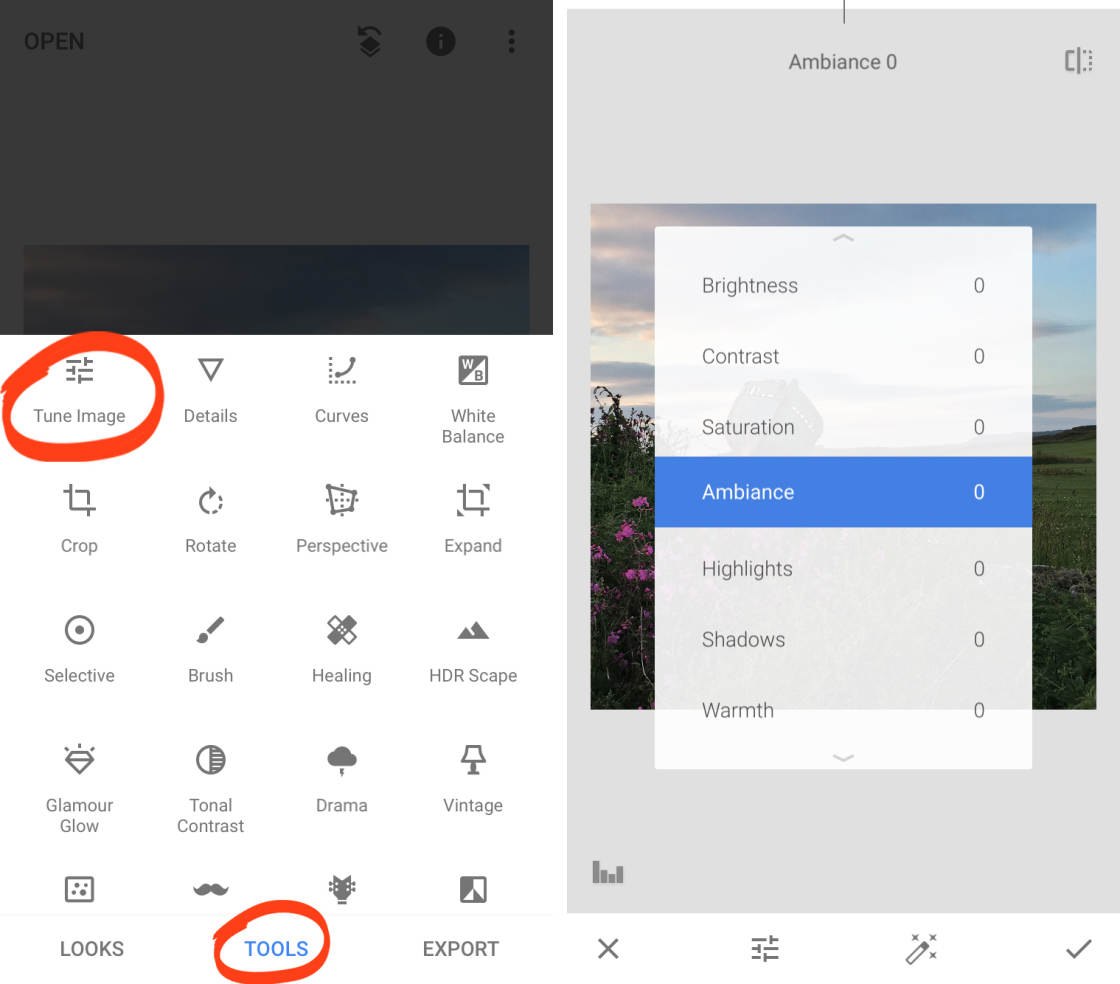
Open a photo, then tap Tools. You’ll see the menu of Snapseed photo editing tools as shown on the right below.
2.1 Tune Image
The Tune Image tool allows you to get perfect color and exposure in your photos.
This is the tool you’ll use most often in Snapseed editing because it greatly improves any photo.
The example below shows how you can turn a dull, dark photo into an eye-catching image with amazing colors.
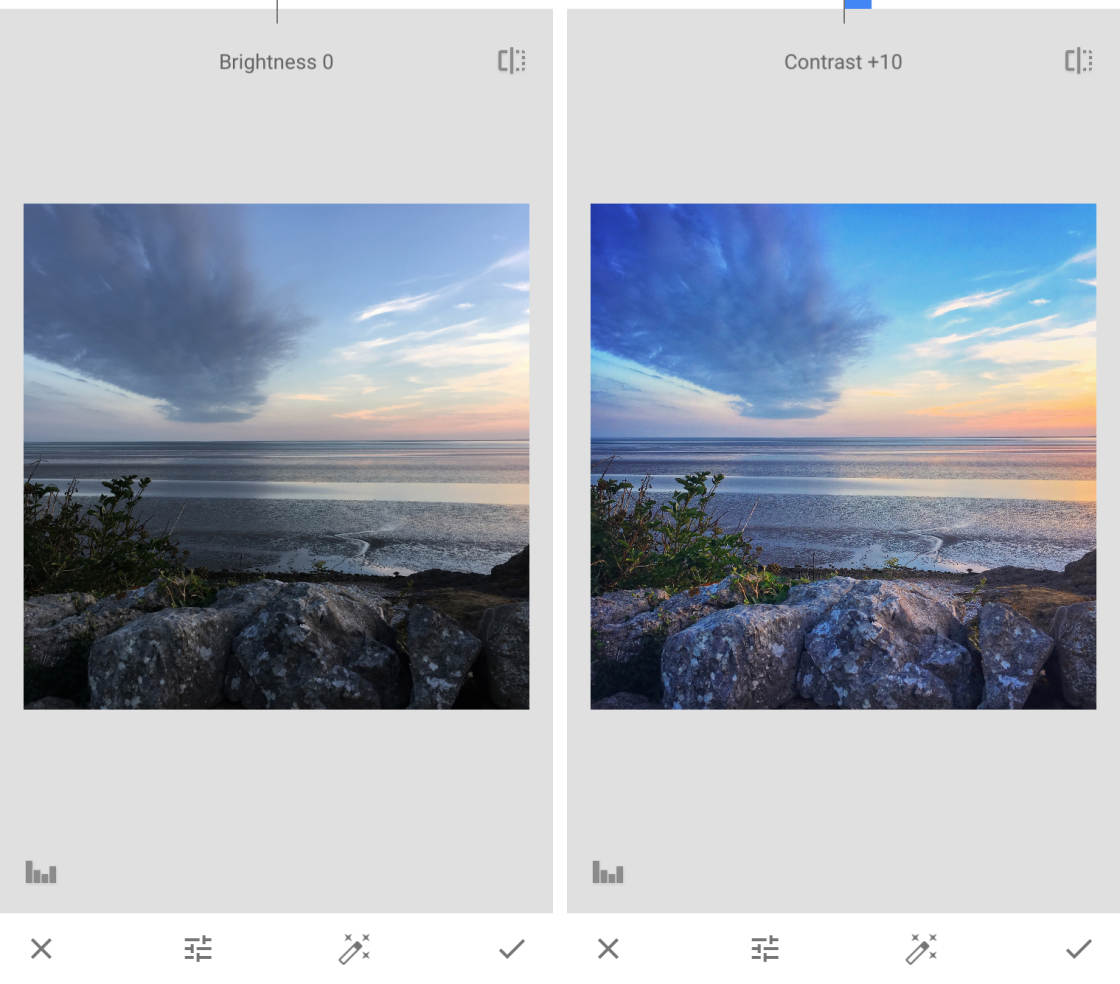
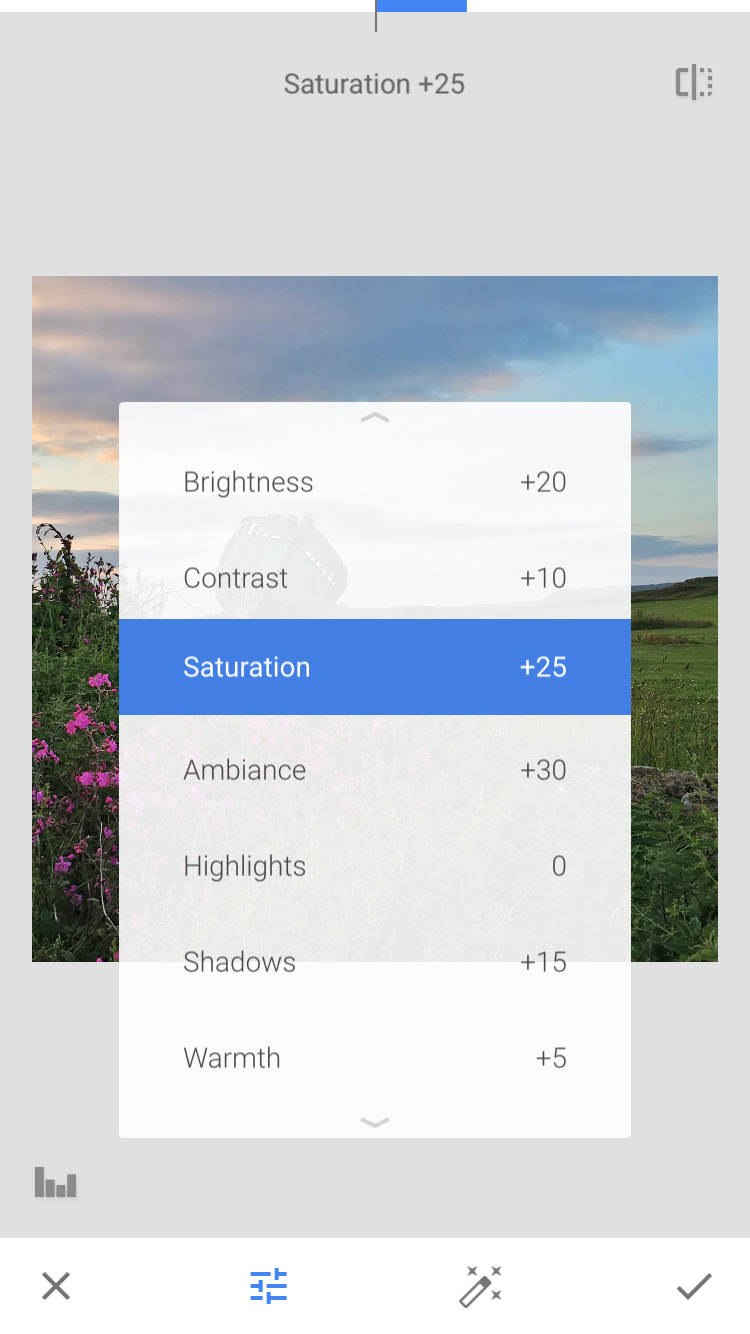
In the Tools section of Snapseed, tap Tune Image. Swipe up or down on your photo to open the Tune Image menu. Select the tool you want to use, e.g. Brightness, Contrast, etc.
Here’s how the Tune Image tools affect color and exposure in your photo:
- Brightness: Darken or brighten the entire image.
- Contrast: Increase or decrease the difference between the dark and bright areas.
- Saturation: Make the colors more or less vibrant.
- Ambiance: Adjust color saturation and contrast at the same time.
- Shadows: Darken or lighten only the shadows (dark areas) in your image.
- Highlights: Darken or lighten only the highlights (bright areas) in your photo.
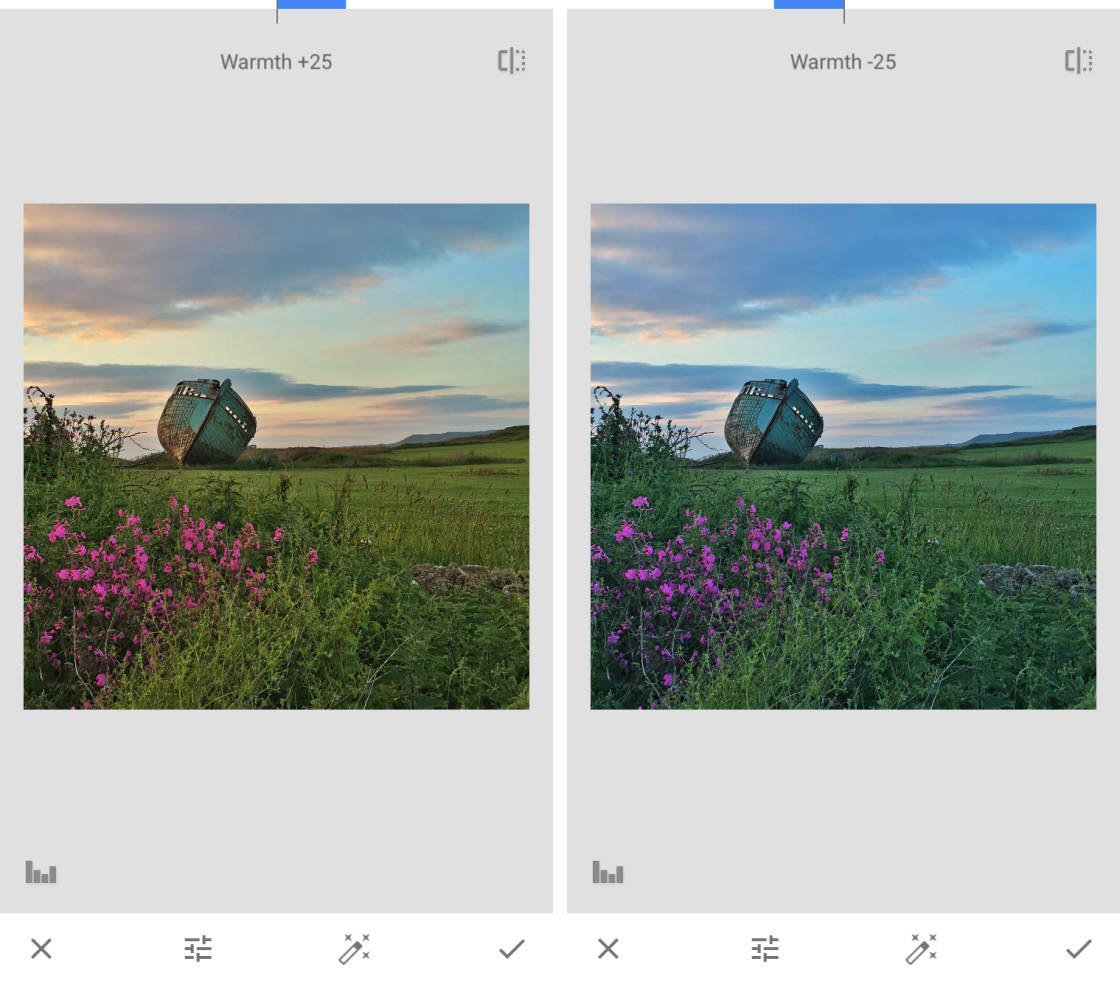
- Warmth: Add a warm orange or cool blue color cast to your image.
When you’ve chosen a tool, swipe left or right over your photo to make the adjustment. You’ll see the setting value at the top of the screen.
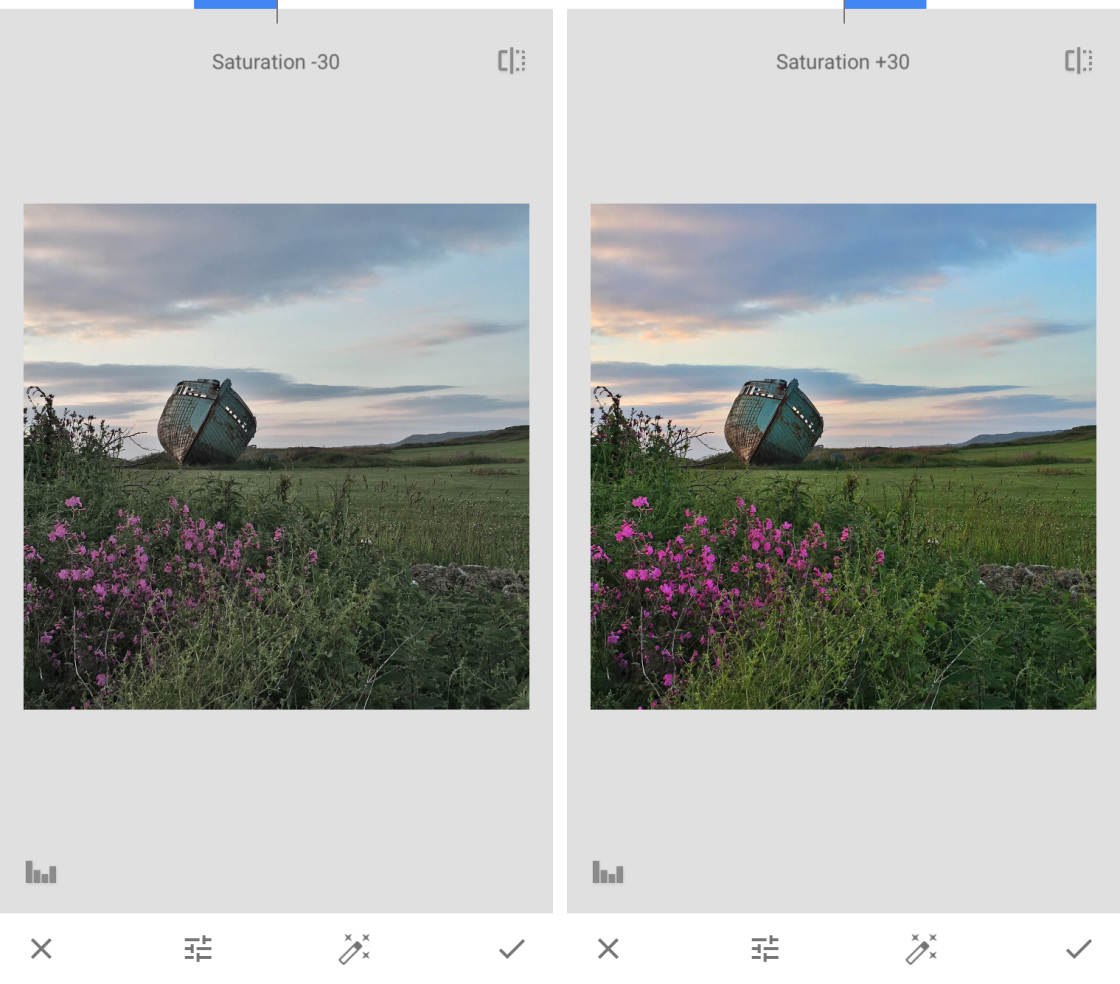
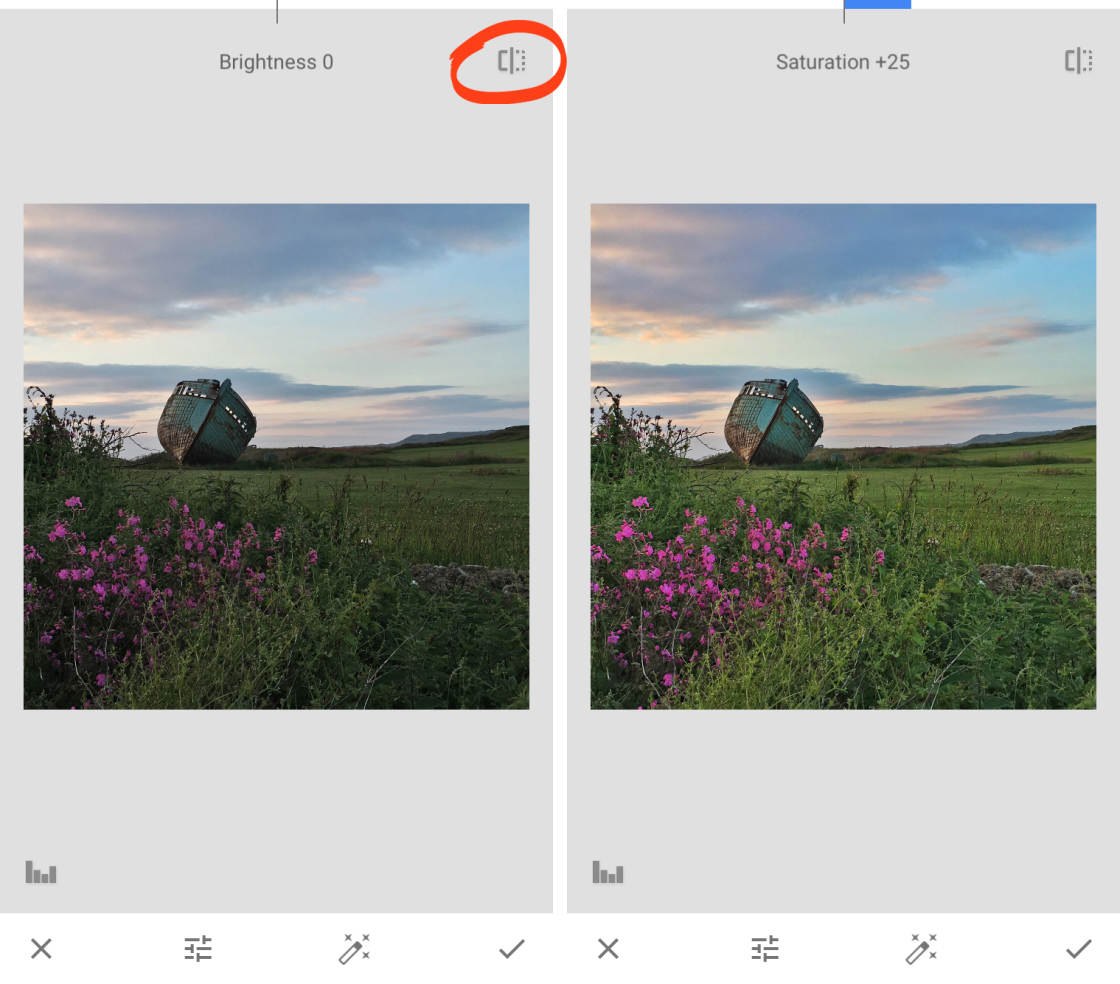
The example above shows how you can adjust the color vibrancy using Saturation. The example below shows how you can warm up or cool down the colors with Warmth.
To open the Tune Image menu again, swipe up or down. Choose another tool, then swipe left or right to adjust the setting. Repeat this process to use any other tools in the menu.
Compare the before and after versions of your photo using the icon at the top right. Tap and hold the icon to see the original photo. Release your finger to return to the edited image.
When you’re happy with your Snapseed edit
2.2 White Balance
The White Balance tool lets you enhance your photo by applying different color tints.
Use these tints to enhance colors, correct unwanted color casts, or change the mood of a photo.
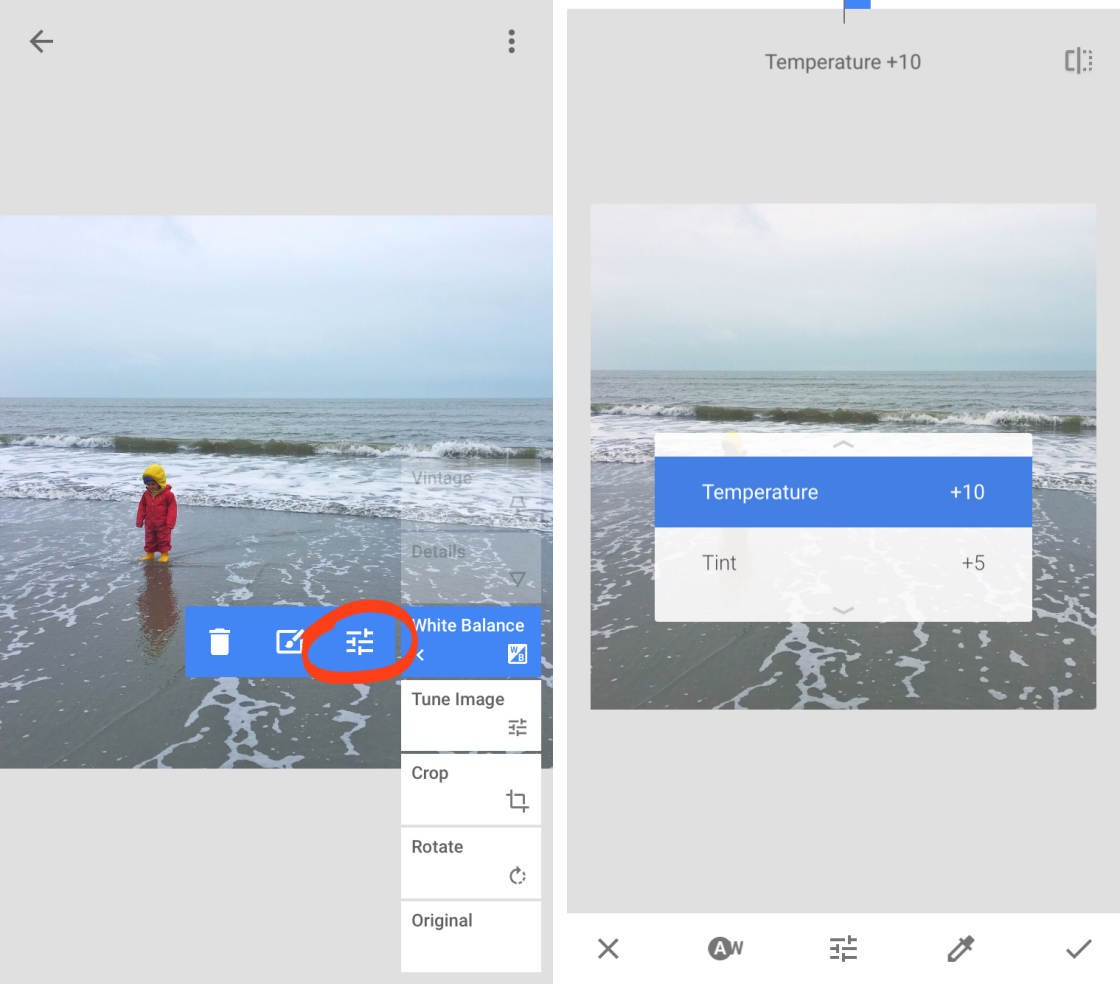
In the Tools section of Snapseed, tap White Balance. Swipe up or down to open the White Balance tools, then select a setting from the menu.
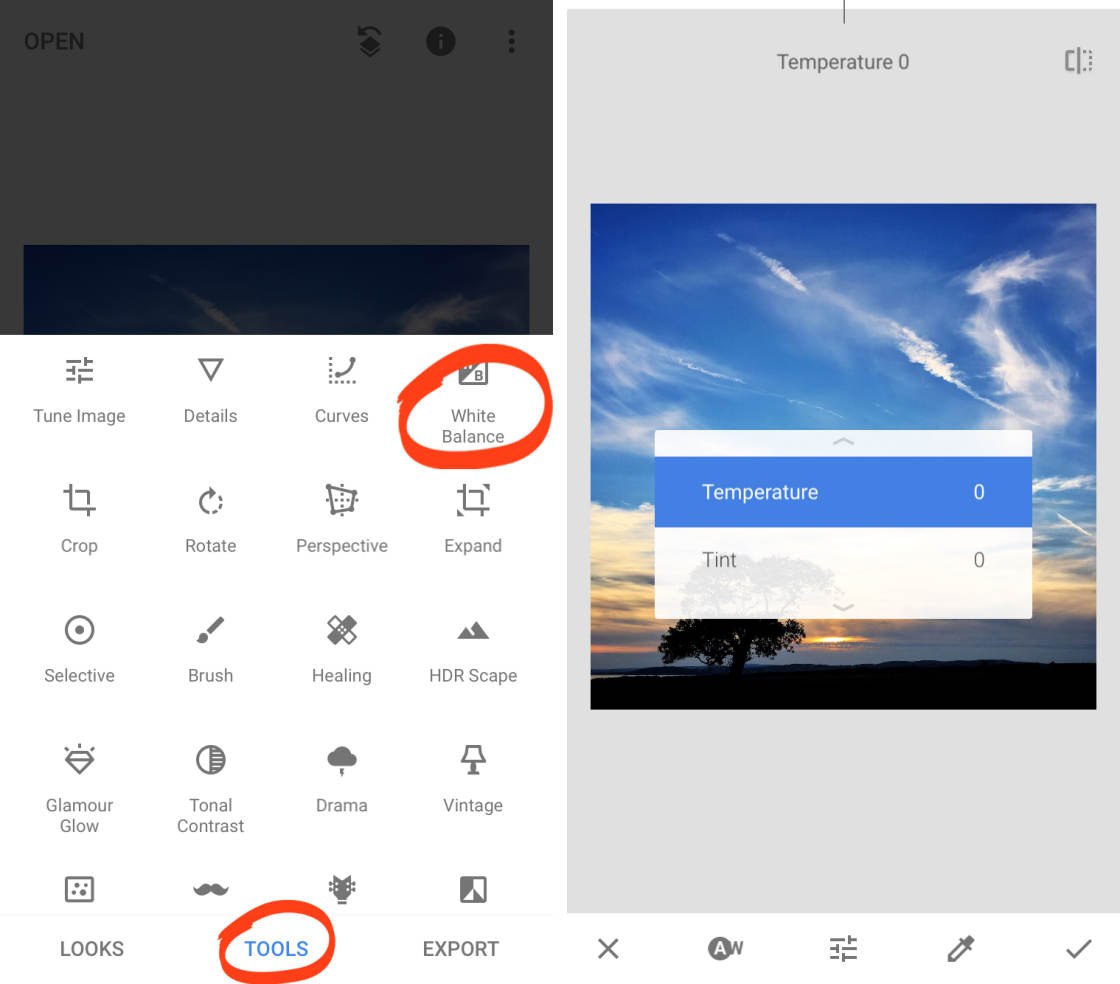
There are two White Balance tools:
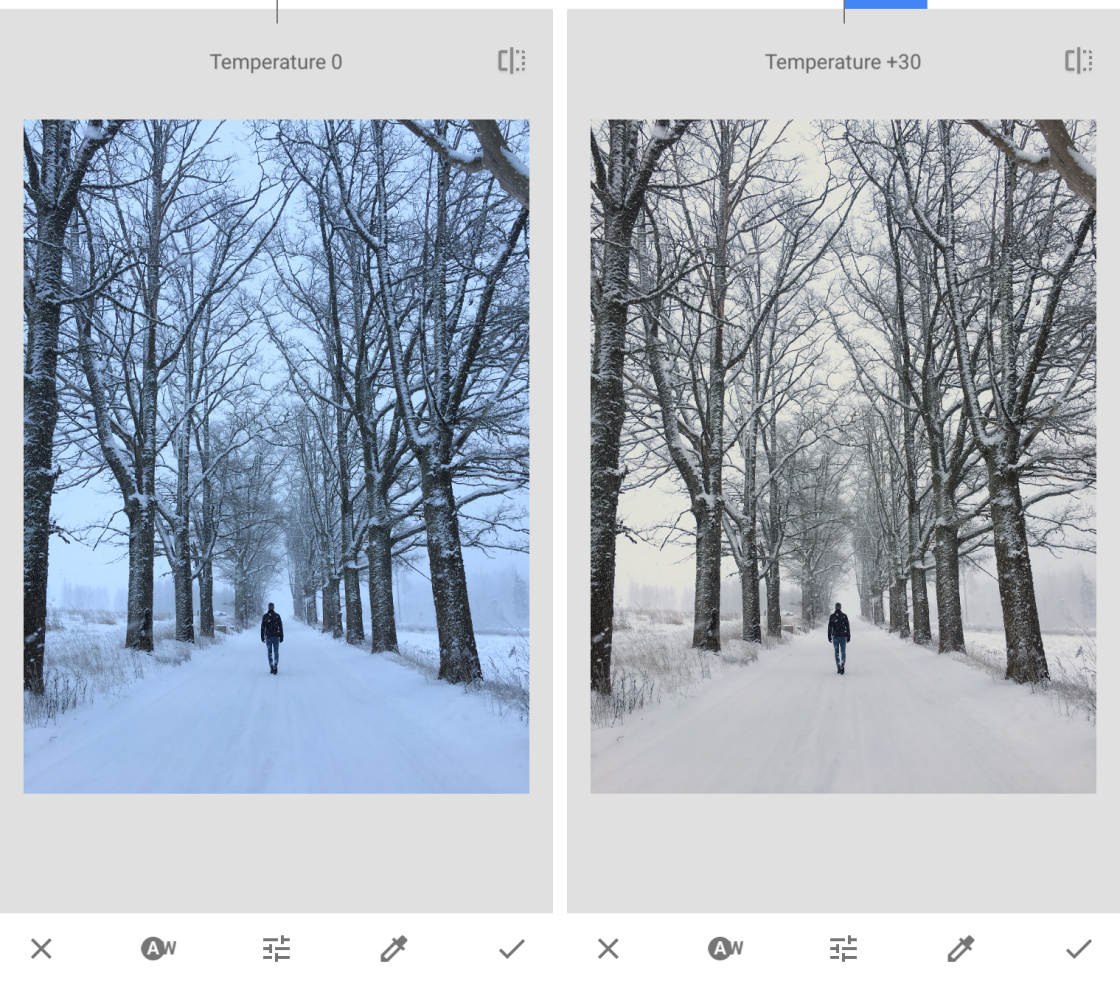
- Temperature: Make the colors in your photo cooler (more blue) or warmer (more orange).
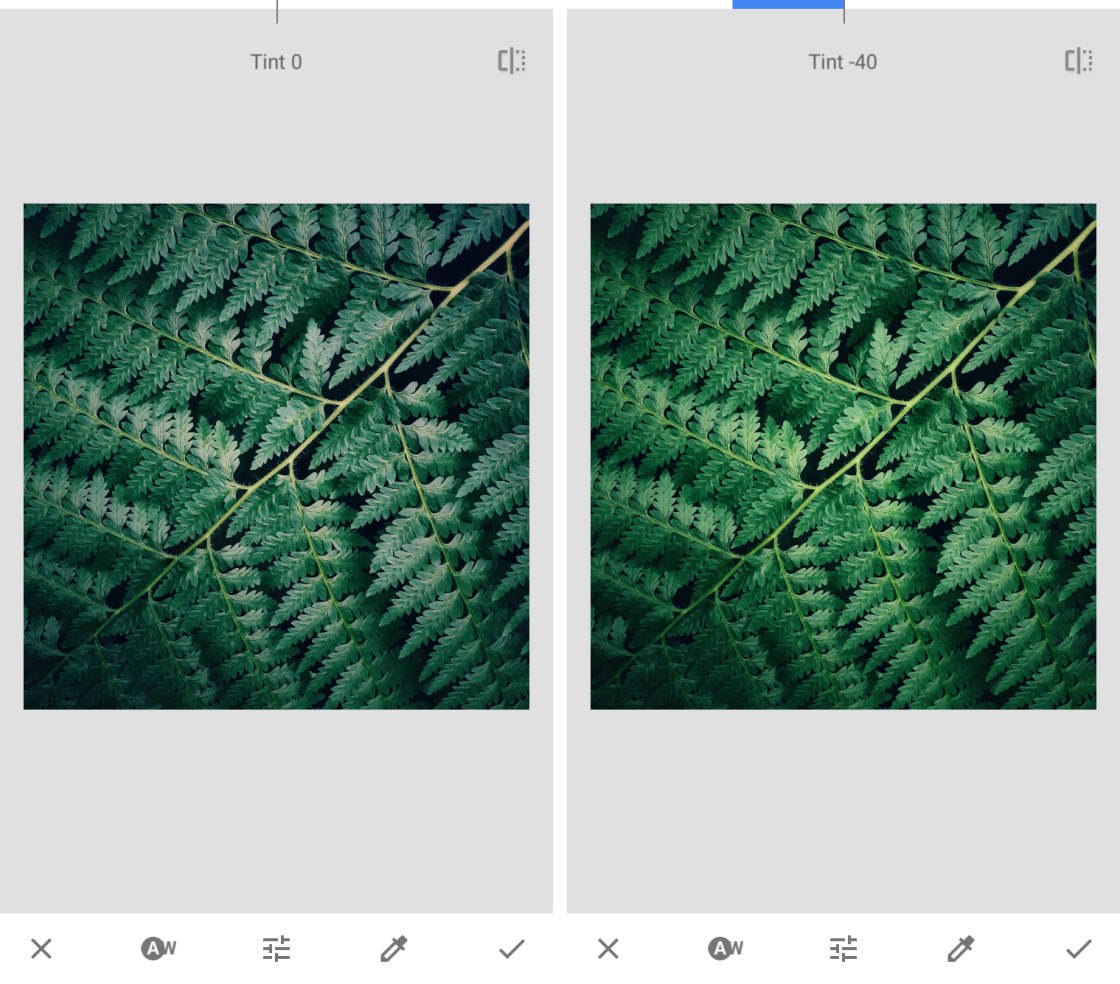
- Tint: Add a green or pink color tint to your image.
When you’ve chosen a tool, swipe left or right to adjust the setting.
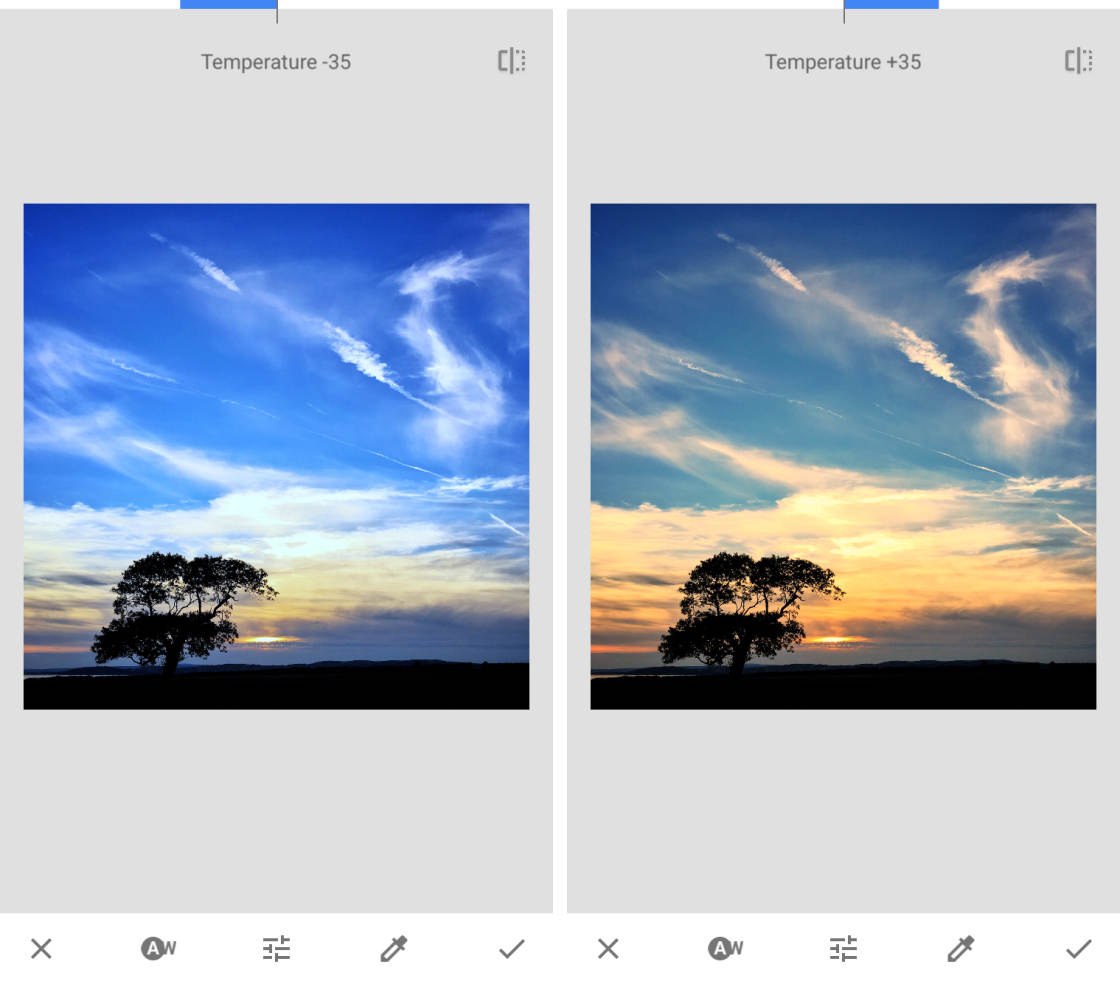
The example above shows how you can cool down or warm up colors using Temperature. Warming up the colors is perfect for enhancing your sunset photos.
Temperature is also useful for correcting warm or cool color casts. In the photo below, the snow appears blue. To fix this, increase the Temperature to warm up the colors and make the snow appear white.
The next example shows how you can use the Tint setting to bring out the greens in a photo. This is great for boosting the colors in your photos of leaves.
When you’ve finished using the White Balance tool, tap the checkmark to apply your edits.
2.3 Details
The Details tool brings out the texture and fine detail in your iPhone photos. This tool works well on photos with an interesting texture, such as rust, wood grain, peeling paint, etc.
In the Snapseed Tools, tap Details. Swipe up or down, and select the setting you want to change.
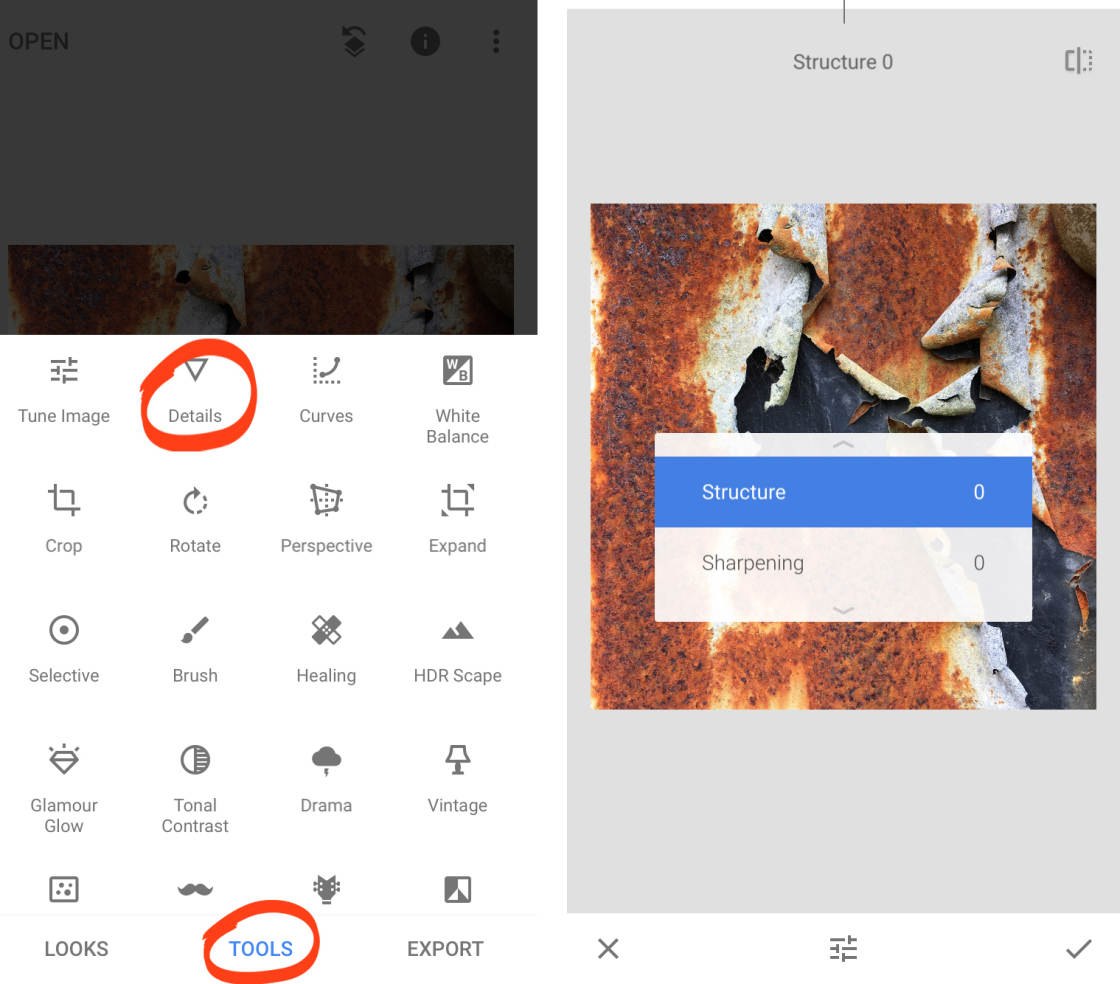
In most cases, Structure produces better results. The Sharpening tool often reduces the quality of your image by introducing grain. If you do use Sharpening, use it in moderation.
Like the other Snapseed tools, swipe across the screen to adjust the setting.
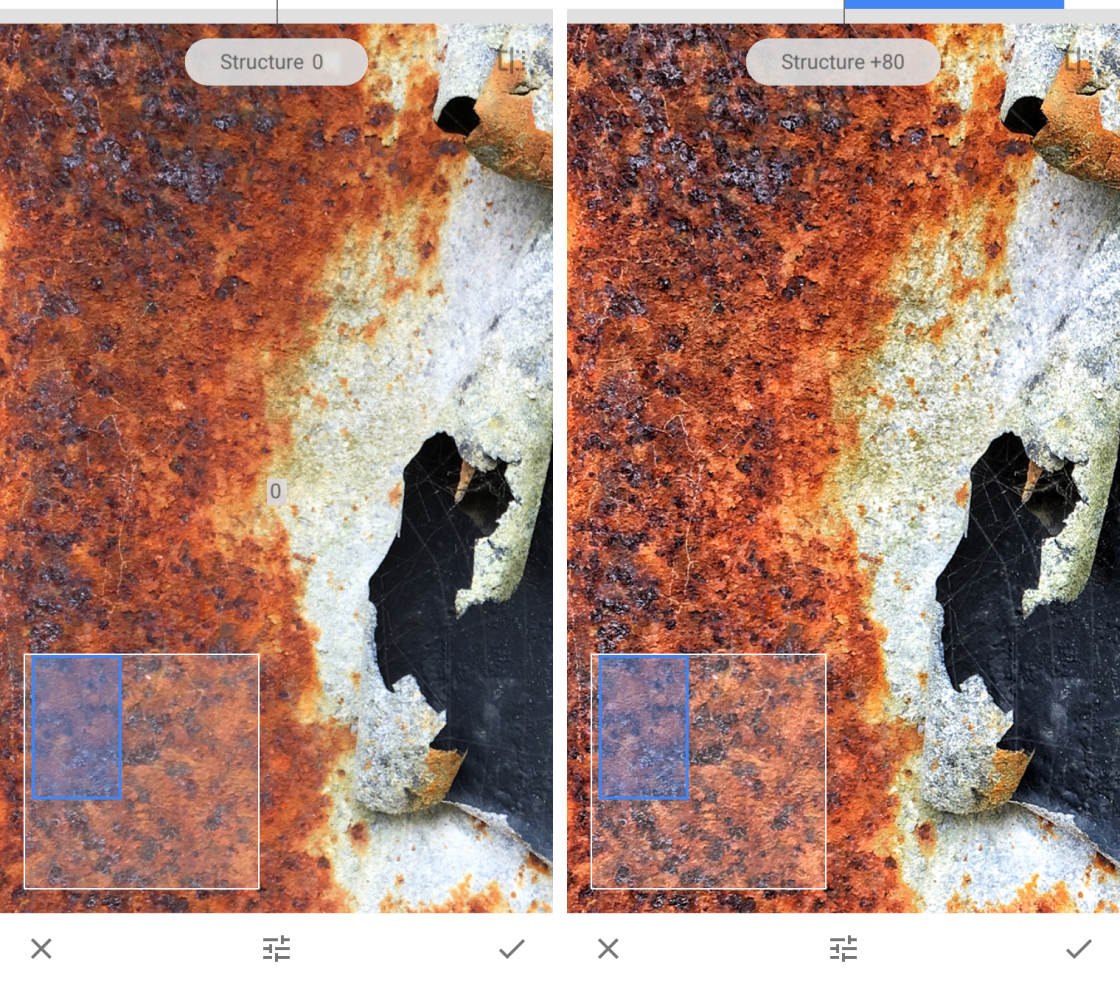
When using the Details tool, zoom in to see your adjustment more clearly. To zoom in, place two fingers on the screen, then pinch outwards (drag your fingers apart). While zoomed in, check your adjustment hasn’t introduced quality issues such as grain.
The Details tool is fantastic for giving your texture photos the wow factor. But keep in mind that it won’t improve all of your pictures.
For example, you wouldn’t want to bring out the texture in a portrait photo. This would make the person’s skin look bad, and make them look a lot older!
3. Modify Individual Edits
Before we explore more Snapseed editing tools, you’re going to discover an incredible feature of this app.
Snapseed uses “non-destructive editing.” That means you can delete or modify any individual edit at any point in the future.
After you’ve applied some edits to a photo, tap the Edit History icon (square with a curved arrow) at the top of the screen. Then tap View Edits in the menu.
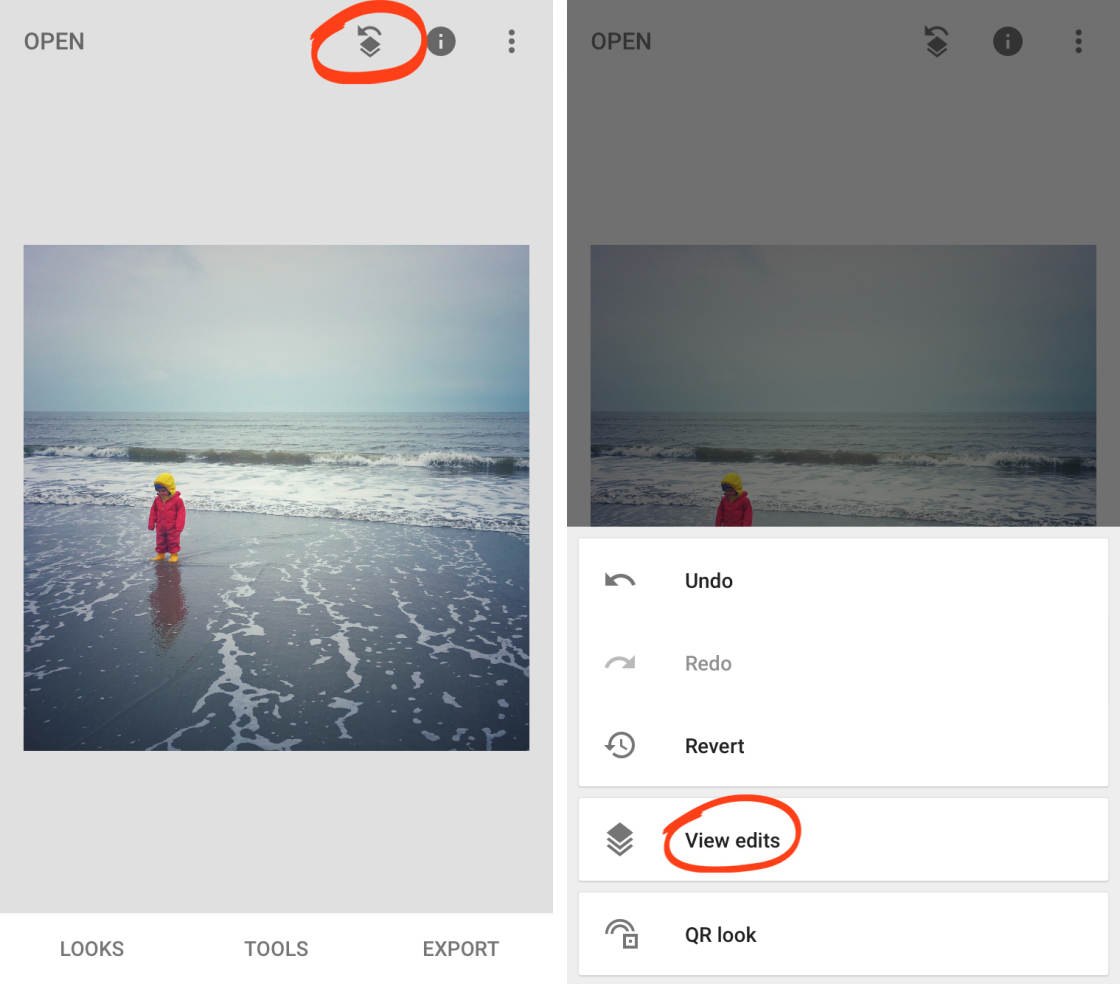
At the bottom right you’ll see the edit stack. This contains all of the edits you made, with the latest edit at the top of the stack. Tap any edit in the stack to reveal three options.
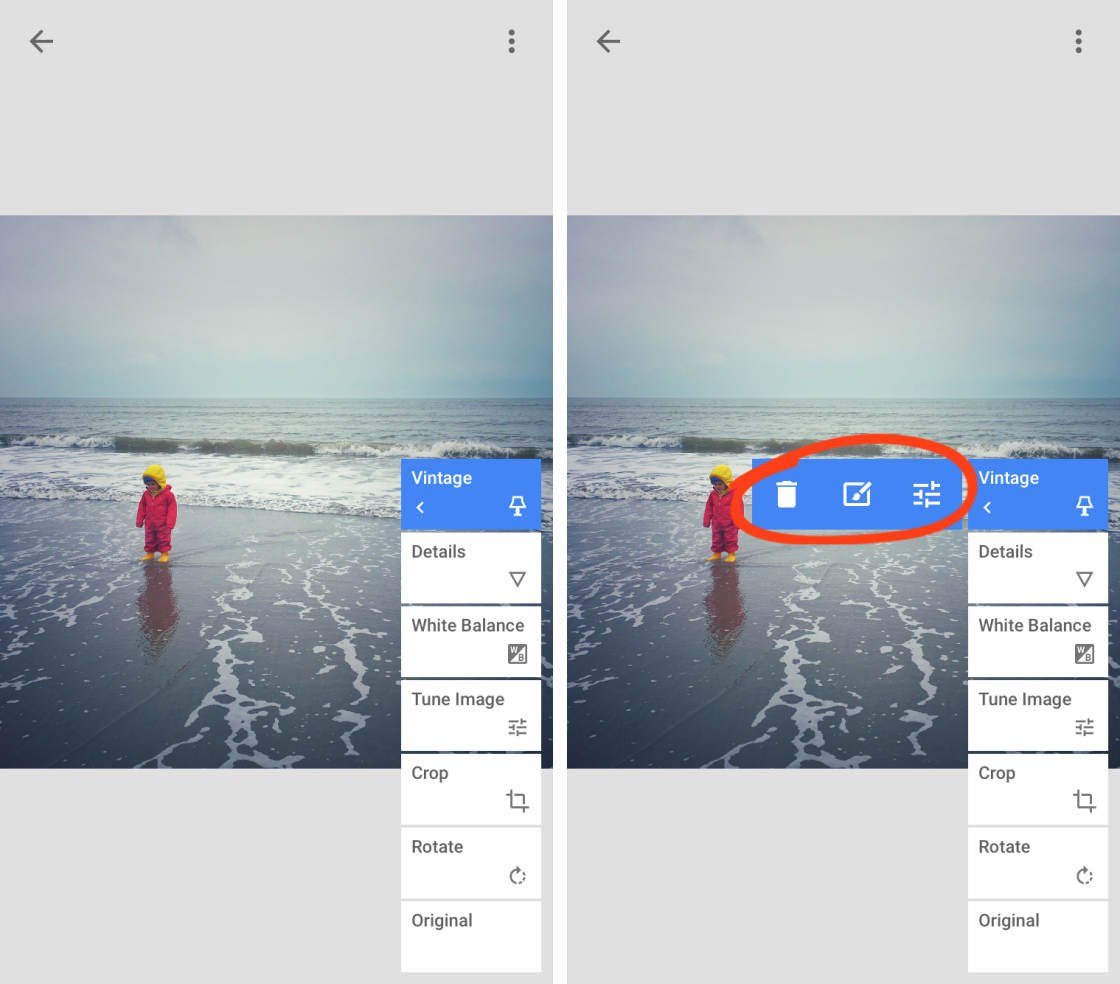
Use the Trash icon to delete that edit from your photo. Tap the Sliders icon to modify the edit. This opens up the editing tool where you can change the settings you originally applied.
The Brush icon opens up the masking options. Masking allows you to apply the edit to selected parts of the image. You’ll learn about masking and selective editing in section 6 of this tutorial.
When you tap an edit in the stack, the edits above it are temporarily removed from your image. But you can bring these edits back by tapping them in the stack.
When you’ve finished modifying edits, tap the back arrow at the top right to exit the Edit History screen.
PicsArt
Basically pics art is a Photoshop of mobile
Where you can change your background add.stickers,change colours and many more things
https://www.youtube.com/c/NSBPictures
See videos and create stunning pics or
Follow up our insta pages


Comments